✅ Included on: Free
Free — no account
Install the extension and open a Brightspace assignment or quiz page. The missing list appears on the page by itself. There is nothing to sign up for and nothing to pay.
1
Step 1
Install the extension & pin it
ClassWatcher is a Chrome extension. Install it from the Chrome Web Store, then pin it to your toolbar so it's always one click away.
Works in Chrome, Edge, and all Chromium browsers (Brave, Opera, etc.). Desktop only — Chrome on iPhone and iPad cannot run extensions at all.
🧩 Add to Chrome · it's free
Works in Chrome, Edge, and all Chromium browsers (Brave, Opera, etc.). Desktop only — Chrome on iPhone and iPad cannot run extensions at all.
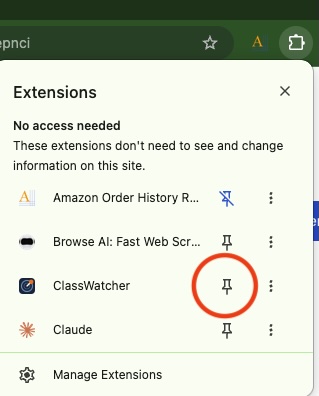
Click the puzzle piece 🧩 → find ClassWatcher → click the pin icon
💡 In Edge, click the puzzle piece and use the eye icon to show ClassWatcher in the toolbar.
2
Step 2
Open an assignment or quiz page
Go to any assignment submission or quiz attempts page in Brightspace — the page you'd normally open to see who handed in. ClassWatcher puts a box on it showing who has not submitted.
There is no Scan button to press and no Brightspace address to set up. The box arrives on its own, with the missing count, a first/last name sort toggle, and when it last updated.
There is no Scan button to press and no Brightspace address to set up. The box arrives on its own, with the missing count, a first/last name sort toggle, and when it last updated.
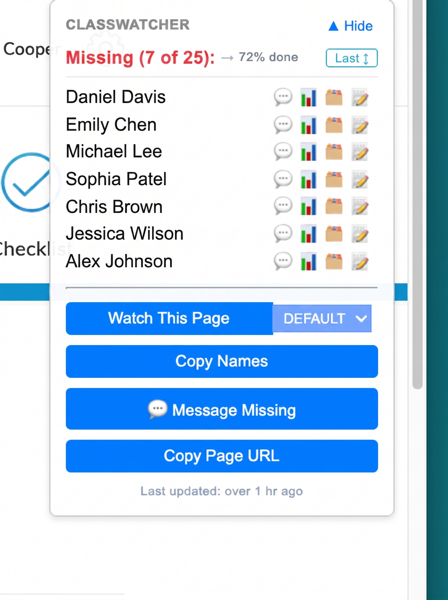
The list, the count, the sort toggle and "Last updated" are free. The four buttons underneath are the part that signs you in.
🔒 What's locked without an account: Watch This Page, Copy Names, Copy Page URL, Message Missing, and the per-student message, details and note buttons. They stay visible and clickable — hover any of them and the tooltip says what it does and "Sign in to unlock."
3
Step 3
Confirm the class when it's offered
To tell you who is missing, ClassWatcher needs to know who is in the course. The first time you open a page in a course it has no list for, it reads the roster from the course you're already in and asks: "Is this <your course>?" — with a role picker so you can import students without sweeping in teachers and support staff.
Nothing is saved until you click Yes. If the guess is wrong, click
Nothing is saved until you click Yes. If the guess is wrong, click
Not my class. The list stays in your browser's extension storage — with no account, it is never sent to us.
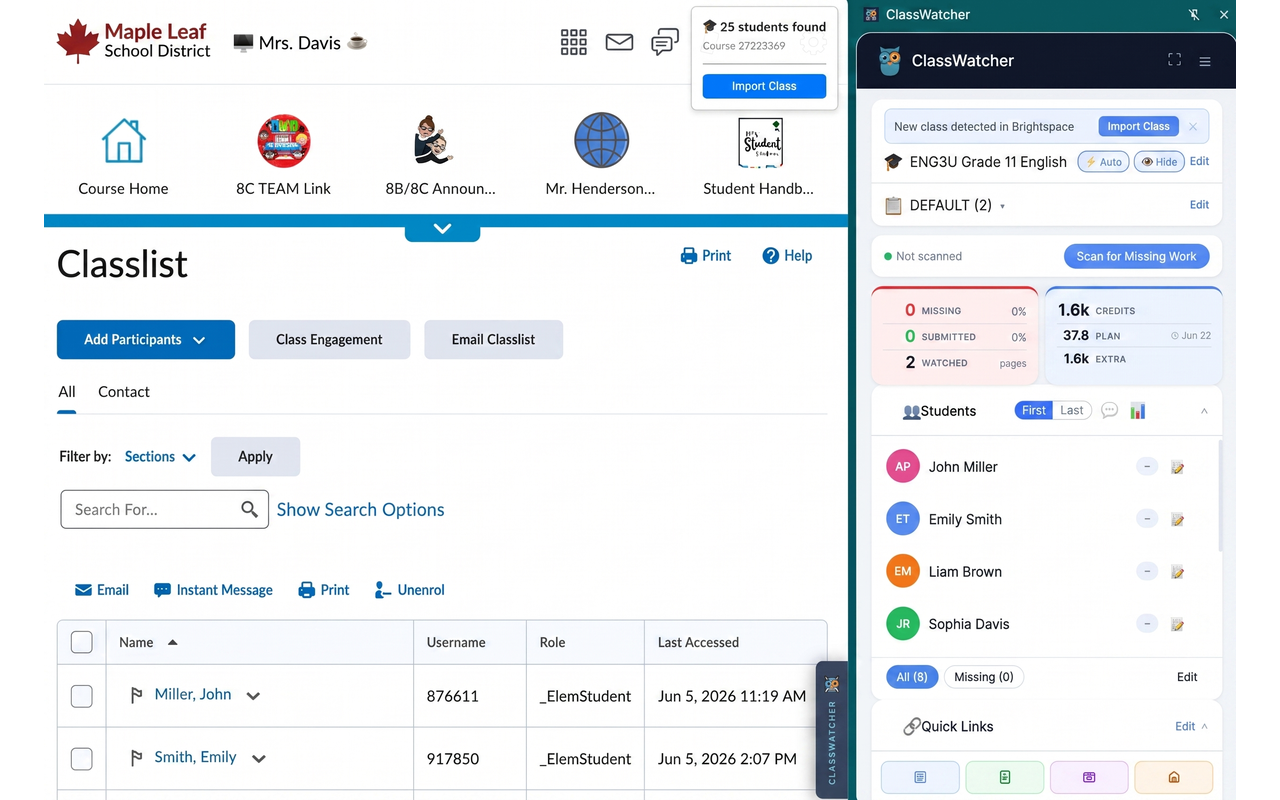
You can also import from the Classlist page itself (
Course Admin → Class List) if you'd rather do it there4
Step 4
Use ▶ Check to jump to a quiz's grade page
On
It is a shortcut, not a scan: ▶ Check never shows a missing count of its own. Seeing every quiz's count side by side is what a watch list does, and that needs an account.
Course Admin → Quizzes (Manage Quizzes), each quiz gets a ▶ Check link beside it. Clicking it takes you to that quiz's grade page — where the box does its work — instead of the quiz edit screen the quiz name opens.
It is a shortcut, not a scan: ▶ Check never shows a missing count of its own. Seeing every quiz's count side by side is what a watch list does, and that needs an account.
💡 Manage Assignments doesn't need one — the assignment's name link already goes straight to its submissions page.
🎉 Done: you can see who's missing on any page.
Included on: Basic · Pro · School
Basic — sign in to act on the list
From CA$8 / month. Everything above stays exactly as it is; these are the buttons that unlock.
- Sign in and enter your details Click the ClassWatcher icon to open the side panel and sign in with Google or an email address. You'll be asked for your name (used in messages), a reply-to email, where you teach (elementary, secondary, college/university or corporate — this sets who messages go to by default), and your school's Brightspace address.
-
Watch pages and scan them all at once
Watch This Pagesaves an assignment or quiz to a watch list. Then one Update Now re-checks every page on that list and shows a missing count for each — the whole course in one view, instead of one page at a time. Unlimited watched pages, and unlimited classes on every plan. - Message parents or students Pick students from the list, choose SMS or email, pick a template or write your own, preview, send. 1 SMS = 1 credit, 1 email = 0.2 credits. Basic includes 50 credits a month. Texting is one-way — if a parent texts back, the reply is logged but not forwarded, and the automatic reply tells them so.
- Contact history Every message and note is logged against the student, so you can see when you last reached a family and what you said. History is stored on our servers, so it follows the student rather than the computer you sent from.
- CSV and Excel export Download your class list, missing items, or contact history as a spreadsheet whenever you need one for a meeting or a report.
⚠️
Once you sign in, your Brightspace URL matters
Enter your school's Brightspace address (e.g.
https://pdsb.elearningontario.ca). Without it, Quick Links won't appear and the panel's navigation buttons won't work. This is the most common reason a new signed-in account looks half-empty. The free on-page box doesn't need it.
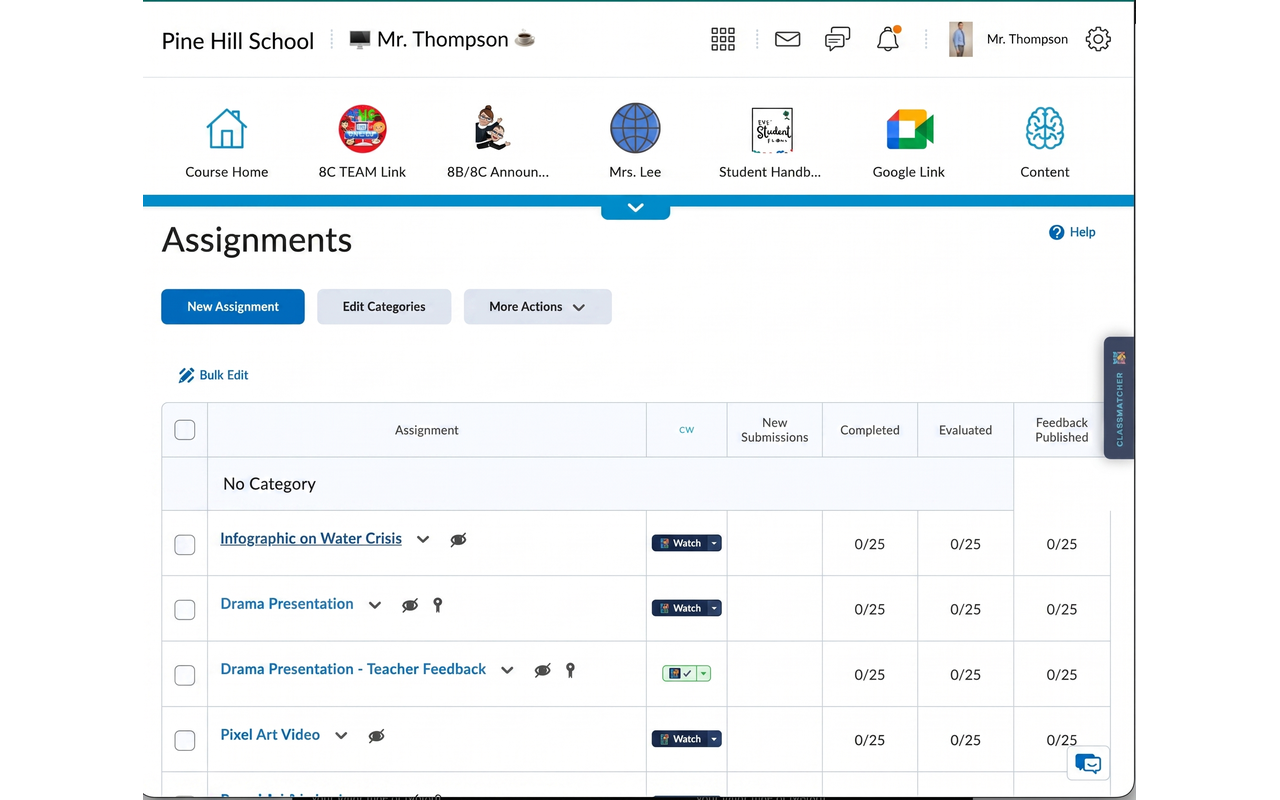
A watch list: every assignment you've added, with its missing count, updated in one pass
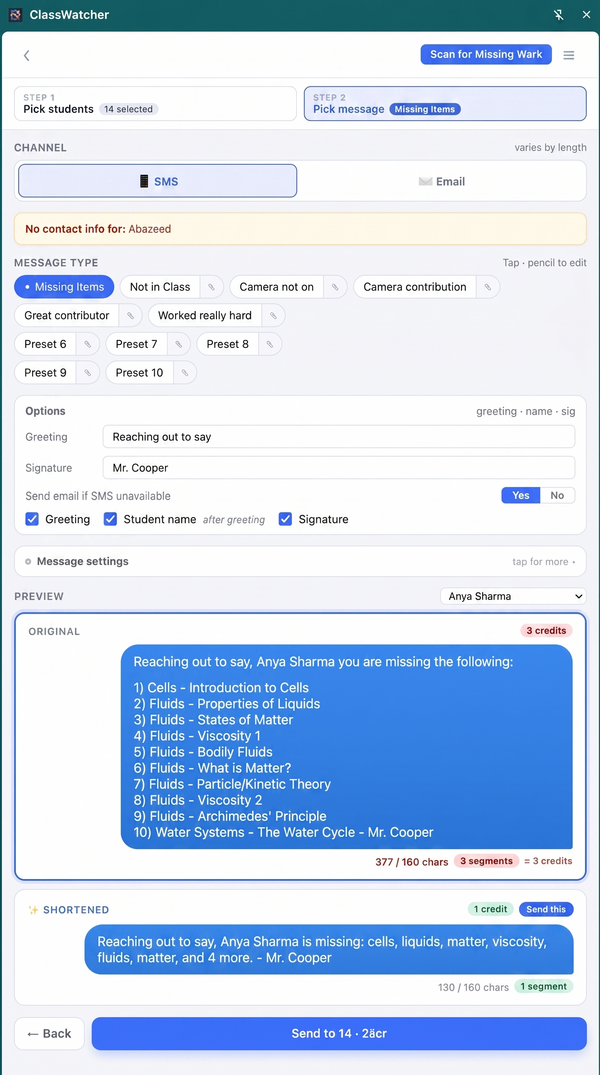
Preview before sending. SMS costs 1 credit, email costs 0.2 credits
Included on: Pro · School
Pro — walk into the parent meeting prepared
CA$19 / month, and 200 credits. Everything in Basic, plus the three things you want in front of you when a parent is sitting across the desk.
- Parent report One student, every assignment and quiz in the course, what they submitted and what they scored — on screen, in Brightspace, in one click. Built for the fifteen minutes before an interview.
- Student Marks export Quiz scores and assignment grades for the whole class, exported together as a spreadsheet.
- Google Sheets export and import Push your class list, missing items, marks or contact history straight into a Google Sheet, and pull parent contact details back in from one. ClassWatcher only ever touches the sheet it creates for you.
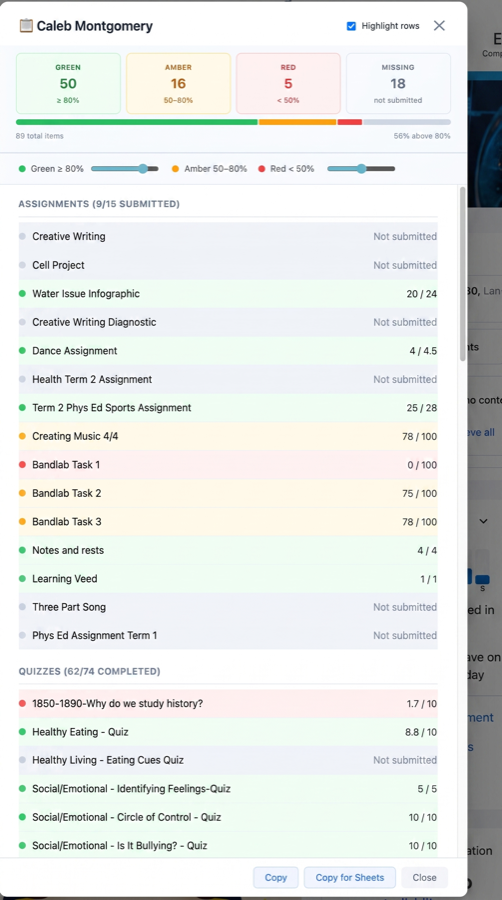
The parent report — one student's full picture, without clicking through the gradebook